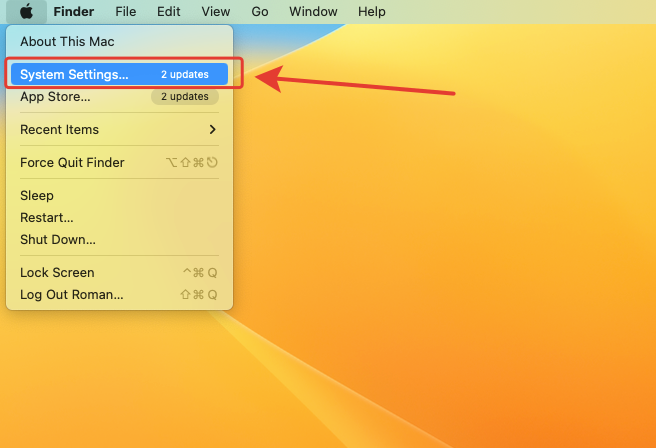
Step 1: Open System Preferences
- Click on the Apple icon in the top-left corner of your screen.
- Select System Settings from the dropdown menu.
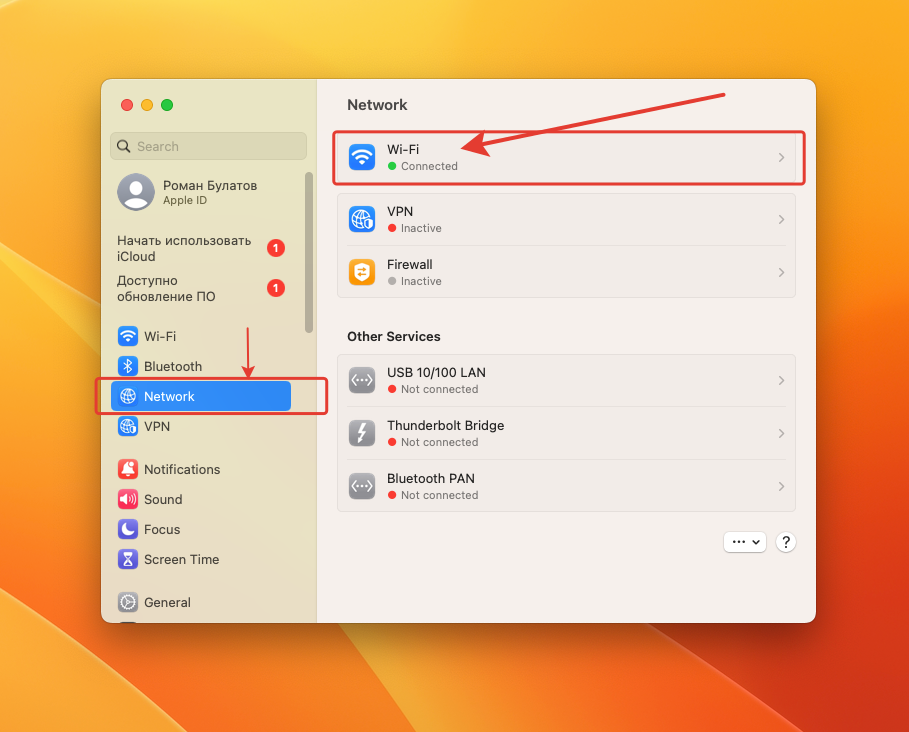
Step 2: Access Network Settings
- In the System Preferences window, click on the Network icon.
- From the list of available networks, select the Wi-Fi network you’re currently using.
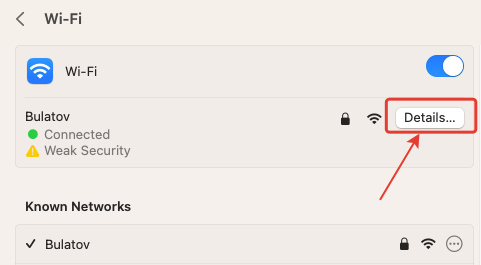
- Click the Advanced button in the bottom-right corner.
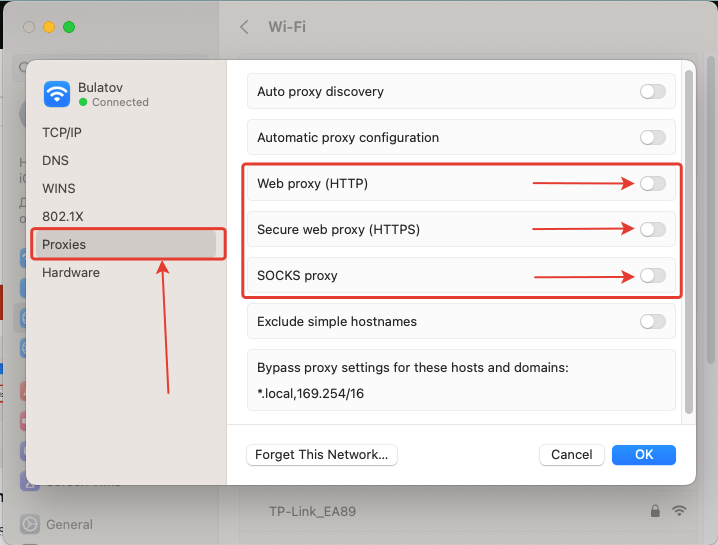
Step 3: Configure Proxy Settings
- In the Advanced settings window, navigate to the Proxies tab.
- Here, you’ll see a list of proxy protocols (e.g., HTTP, HTTPS, SOCKS). Select the protocol you want to configure.
- Under Server, enter the required proxy details (address and port).

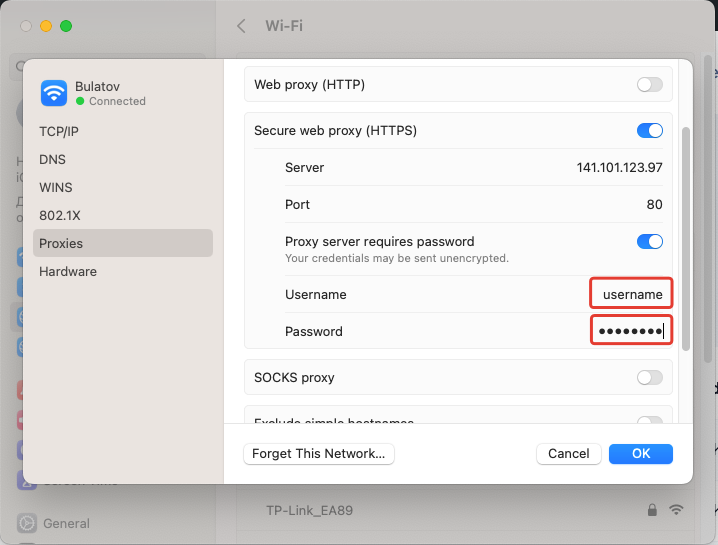
Step 4: Enter Authentication Details
- Check the box labeled Proxy server requires a password.
- Enter your Username and Password. These are the same credentials you use to log in to your proxy provider’s dashboard.
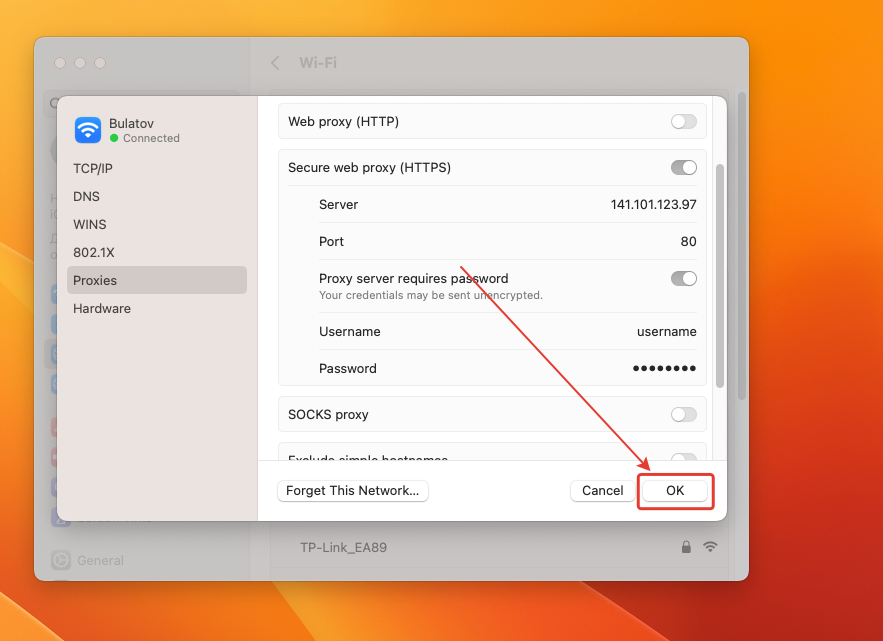
Step 5: Save and Apply Settings
- Once all the details are entered, click OK to confirm.
Congratulations! Your Mac is now configured to use a proxy server.
Removing a Proxy Server on macOS
If you no longer need a proxy, disabling it is straightforward:
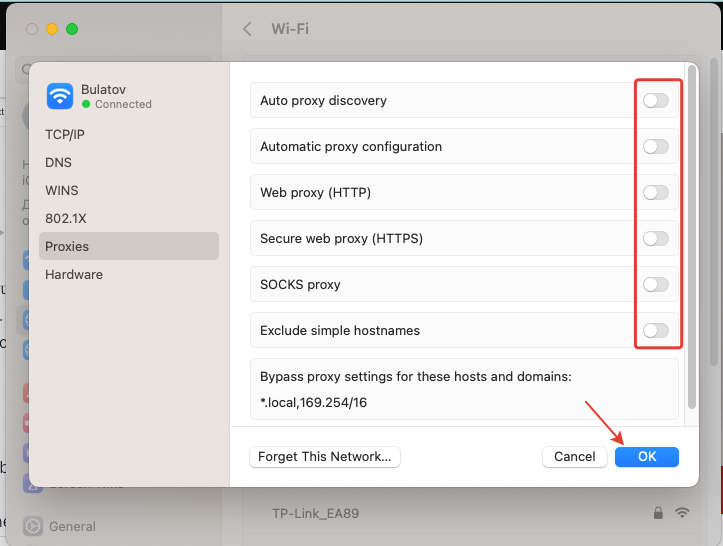
- Go back to the Proxies tab in the Network settings.
- Make sure all the protocol checkboxes are unchecked.
- Click OK to confirm.
Your proxy settings will now be removed, and your Mac will connect directly to the internet.
Configuring and removing a proxy server on macOS is a simple process that can significantly enhance your online experience.
Important Note: Please be aware that the tools and services mentioned in this guide are third-party offerings not owned or controlled by ProxyLib. Each provider is responsible for their own software and services. Always review the provider’s policies and conduct due diligence before using their services.
While this guide focuses on configuring proxy servers for macOS, Windows users can also benefit from similar setups. If you’re using a Windows device, check out our detailed guide on how to set up a proxy on Windows for step-by-step instructions. Whether you’re on macOS or Windows, configuring a proxy server can enhance your online privacy, bypass geo-restrictions, and improve network performance.